

5 Irresistible Pellet Grill Chicken Breast Tips
Table of Contents
Are you tired of dry, flavorless chicken breasts? Your pellet grill is the perfect tool to transform pellet grill chicken breast into a juicy, flavorful masterpiece. Unlike traditional grilling methods, cooking chicken breasts on a pellet grill offers consistent temperature control while infusing delicate smoky flavors. Follow these five game-changing pellet grill chicken breast tips to elevate your backyard cooking experience and master the art of perfect pellet grill chicken breast every time.
Ingredients for Perfect Pellet Grill Chicken Breast
Before diving into the techniques, let’s ensure you have everything needed for outstanding pellet grill chicken breast:
Main Ingredients:
- 4 boneless, skinless chicken breasts (approximately 6-8 oz each)
- 2 tablespoons olive oil or avocado oil
- 2-3 tablespoons of your favorite poultry rub or seasoning blend
Optional Ingredients (for enhanced flavor):
- For brine: ¼ cup kosher salt, ¼ cup sugar, 4 cups water
- For marinade: ½ cup olive oil, 3 tablespoons lemon juice, 2 cloves minced garlic, 1 tablespoon herbs
- For basting: ½ cup of your favorite BBQ sauce
- For serving: Lemon wedges, fresh herbs, or compound butter
Equipment Needed:
- Pellet grill with wood pellets (apple, cherry, or maple recommended for chicken)
- Reliable meat thermometer
- Tongs for handling chicken
- Small bowl for oil and seasonings
- Optional: Meat mallet for evening out thickness
- Optional: Spray bottle with apple juice or chicken broth for spritzing
Step-by-Step Instructions for Perfect Pellet Grill Chicken Breast
Now that we understand the tips and have our ingredients ready, let’s walk through the complete process for creating perfect pellet grill chicken breast:
Step 1: Prepare the Chicken (15-20 minutes)
- Remove chicken breasts from packaging and pat dry with paper towels.
- Trim away any excess fat or unwanted pieces from the chicken breasts.
- Even out the thickness using either:
- Pounding method: Place chicken between plastic wrap and gently pound thicker portions to about ¾ inch thickness
- Butterfly method: Slice horizontally through thicker parts to create an even thickness
- If brining, submerge chicken in brine solution (water, salt, sugar) and refrigerate for 2-4 hours, then remove and pat dry.
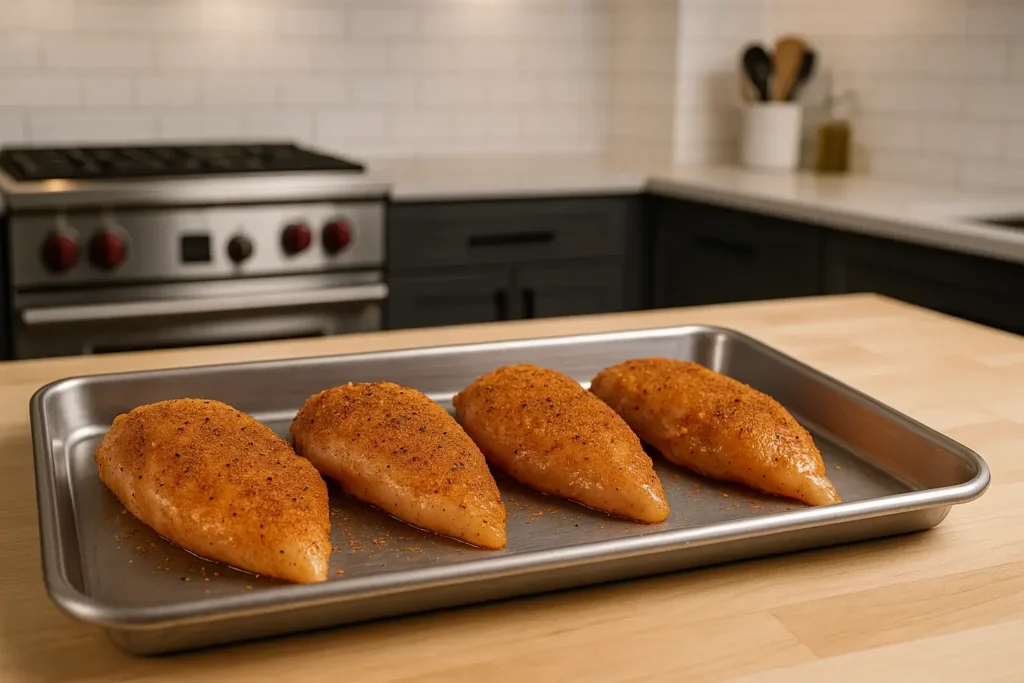
Step 2: Season the Chicken (5-10 minutes)
- Drizzle both sides of chicken breasts with olive oil, ensuring even coating.
- In a small bowl, prepare your seasoning mix if using multiple spices.
- Apply seasoning generously to all sides of the chicken, pressing gently to adhere.
- Let chicken sit at room temperature for 15 minutes to allow seasonings to absorb.
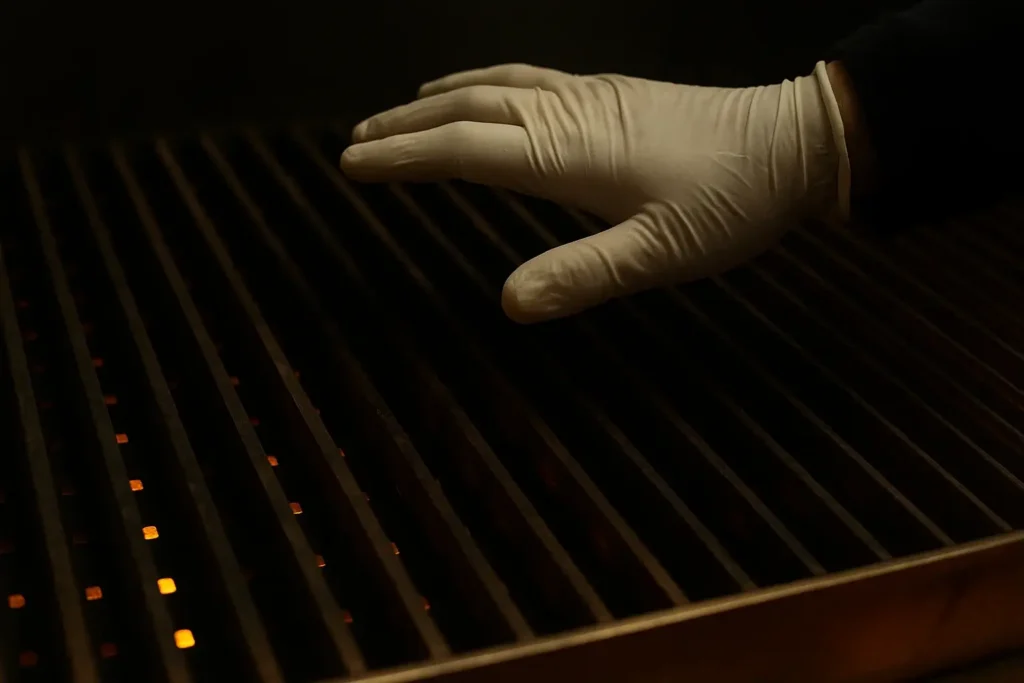
Step 3: Preheat and Prepare the Pellet Grill (15 minutes)
- Fill the pellet hopper with your chosen wood pellets (apple, cherry, or maple recommended).
- Start the pellet grill and set temperature to 325°F.
- Allow the grill to preheat fully, usually about 10-15 minutes.
- Clean grates with a grill brush once preheated.
Step 4: Initial Cooking Phase (15-20 minutes)
- Place seasoned chicken breasts on the preheated grill, positioning them in the center.
- Close the lid and maintain 325°F temperature.
- Cook undisturbed for about 15-20 minutes.
- Periodically check internal temperature with a meat thermometer.
- Optional: If using a spray bottle, quickly spritz chicken with apple juice every 10 minutes.
- Cook until internal temperature reaches 140-145°F.
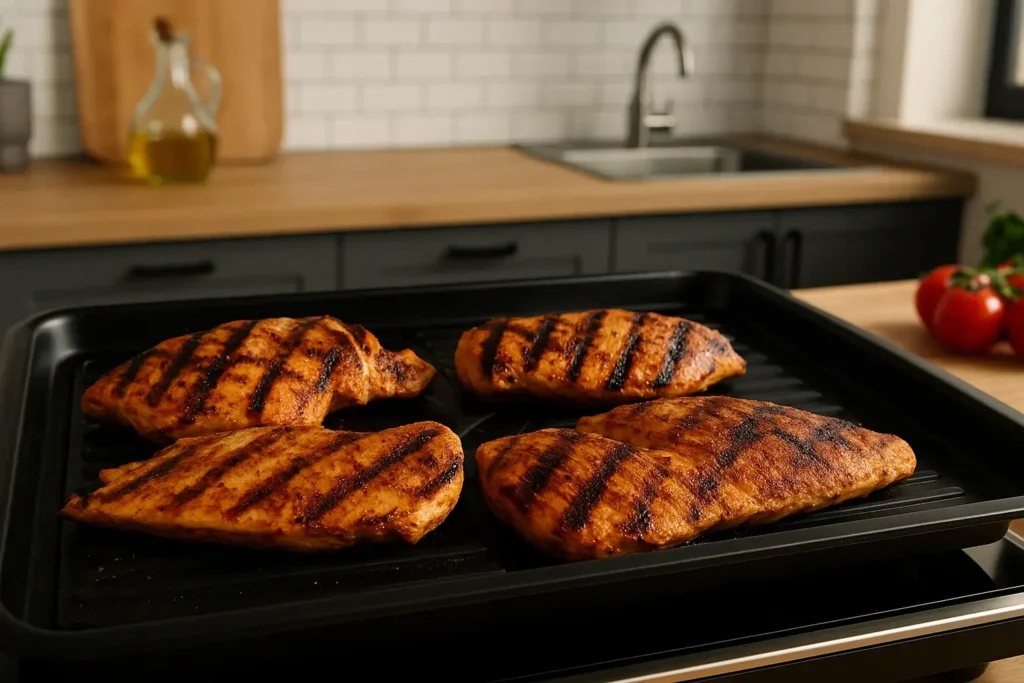
Step 5: Searing Phase (5-10 minutes)
- Increase pellet grill temperature to 450°F.
- Once temperature is reached, reposition chicken breasts (if using a grill with a sear zone, move them there).
- Sear chicken for 2-3 minutes per side to develop grill marks and caramelization.
- Optional: For crosshatch marks, rotate chicken 90 degrees halfway through each side’s searing time.
- Optional: Brush with BBQ sauce when internal temperature reaches 150°F.
- Continue cooking until internal temperature reaches 160°F.
Step 6: Rest and Serve (5-10 minutes)
- Remove chicken from the grill once it reaches 160°F internal temperature.
- Transfer to a clean plate or cutting board.
- Tent loosely with aluminum foil.
- Rest for 5-10 minutes to allow juices to redistribute and carryover cooking to bring temperature to 165°F.
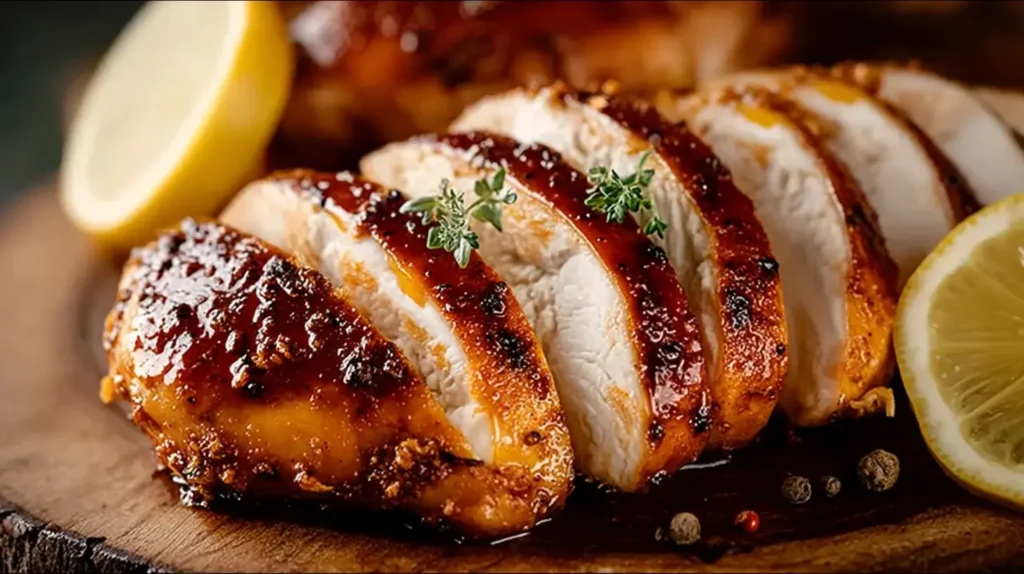
- Slice chicken against the grain for maximum tenderness.
- Serve with lemon wedges, fresh herbs, or additional sauce if desired.
Total Time: Approximately 1 hour (plus brining time if using)
Tip 2: Season Generously for Perfect Pellet Grill Chicken Breast
Proper seasoning transforms good chicken into great pellet grill chicken breast, especially when working with a pellet grill where smoky flavors complement the right seasonings.
Begin by lightly coating your evenly-thick chicken breasts with a high-quality olive oil or avocado oil. This oil serves two important purposes for successful pellet grill chicken breast: it acts as a binder for your seasonings and helps promote better browning on the grill.
Season generously on all sides with your preferred rub or seasoning blend. Don’t be shy—pellet grill chicken breast can handle robust seasoning. Apply enough that the surface appears well-coated, then wait about 10-15 minutes. You’ll notice the seasoning begins to look wet as it draws moisture from the chicken—this is perfect and indicates good adhesion for your pellet grill chicken breast.
For those willing to plan ahead, consider these flavor-boosting preparation methods for outstanding pellet grill chicken breast:
- Dry brining: Apply kosher salt (about ½ teaspoon per breast) 2-24 hours before cooking and refrigerate uncovered. This process enhances moisture retention and flavor penetration.
- Wet brining: Soak chicken in a solution of 4 cups water, ¼ cup kosher salt, and ¼ cup sugar for 2-4 hours. This greatly increases juiciness, especially helpful for pellet grill chicken breast which tends to be cooked in a drier heat method.
- Marinating: A simple marinade with oil, acid (lemon juice or vinegar), and aromatics can tenderize and flavor the pellet grill chicken breast when applied for at least 30 minutes or up to 4 hours.
These preparation techniques particularly complement pellet grill chicken breast cooking by adding moisture reserves that withstand the drying tendency of the prolonged cooking process, resulting in juicier, more flavorful pellet grill chicken breast every time.
Tip 3: Grilling Setup & Initial Cook (for Smoky Flavor)
This is where pellet grill chicken breast cooking truly shines compared to traditional grilling methods. The ability to precisely control temperature while automatically feeding wood pellets creates the perfect environment for infusing smoke flavor into chicken breasts.
Begin by preheating your pellet grill to 325°F. This moderate temperature strikes the perfect balance for pellet grill chicken breast—hot enough to begin cooking efficiently but low enough to allow smoke flavor to penetrate before the exterior forms a barrier.
For wood pellet selection when cooking pellet grill chicken breast, milder fruitwoods like apple, cherry, or maple offer subtle sweetness that complements chicken beautifully. Stronger woods like hickory or mesquite can work but consider blending them with milder woods to avoid overwhelming the delicate flavors of your pellet grill chicken breast.
Place your prepared chicken breasts on the preheated pellet grill grates. For maximum smoke exposure, position them in the center of the grill, away from direct heat if your particular pellet grill model has hot zones. Close the lid and allow the chicken to absorb that wonderful smoke flavor that makes pellet grill chicken breast so special.
During this initial cooking phase of the pellet grill chicken breast process, resist the urge to frequently open the lid. Every peek releases accumulated smoke and drops the temperature. Instead, let the chicken cook undisturbed until it reaches an internal temperature of approximately 140-145°F. This usually takes about 15-20 minutes depending on the thickness of your breasts.
This is where the smoked chicken breast temp expertise comes into play. By targeting this 140-145°F intermediate temperature for your pellet grill chicken breast, you’re allowing maximum smoke flavor development while setting up for the crucial searing phase that follows.
Tip 4: Finishing Cook for Perfect Pellet Grill Chicken Breast (Searing and/or Basting)
Now comes the transformation that elevates your pellet grill chicken breast from good to extraordinary. The finishing phase creates a flavorful exterior while bringing the meat to the perfect final temperature.
Increase your pellet grill temperature to 450°F. This higher temperature is crucial for developing those beautiful grill marks and caramelizing the exterior of your pellet grill chicken breast. If your pellet grill has GrillGrates or a dedicated searing zone, now is the time to utilize them for optimal pellet grill chicken breast results.
Once your grill reaches the higher temperature, return the chicken breasts to the grates. For beautiful grill marks on your pellet grill chicken breast, place the breasts at a 45-degree angle to the grates. Cook until the chicken naturally releases from the grates before attempting to flip—forced flipping tears the meat and loses precious juices from your pellet grill chicken breast.
For enhanced flavor, consider basting your pellet grill chicken breast with your favorite BBQ sauce when the chicken reaches 150°F internal temperature. The heat will caramelize the sauce, creating a delicious glaze. If you prefer a crosshatch pattern on your pellet grill chicken breast, rotate the chicken 90 degrees halfway through the searing process on each side.
Throughout this finishing process, monitor the smoked chicken internal temp closely using a reliable instant-read thermometer. This is absolutely critical for achieving the perfect pellet grill chicken breast without drying out the meat.
Continue cooking until the pellet grill chicken breast reaches 160°F internal temperature. This is your signal to remove it from the grill, as the next step will complete the cooking process perfectly.
When comparing pellet grill chicken breast to traditional smoked chicken breast recipe techniques, this two-phase approach offers the best of both worlds. Your pellet grill chicken breast gets the extended smoke exposure of traditional smoking but finishes with the direct heat that creates an appealing exterior texture and appearance.
Tip 5: Resting is Crucial
Perhaps the most overlooked yet critical step in achieving perfect pellet grill chicken breast is proper resting. This final phase makes the difference between good and exceptional results.
Once your chicken reaches 160°F, promptly remove it from the grill. Transfer the breasts to a clean plate or cutting board and tent loosely with aluminum foil. This tenting is important—it retains enough heat for carryover cooking while allowing some steam to escape, preventing the carefully created exterior from becoming soggy.
Allow the chicken to rest for at least 5 minutes, though 8-10 minutes is ideal for larger breasts. During this resting period, two important processes occur:
- Carryover cooking: The residual heat continues gently cooking the chicken, bringing it to the food-safe internal temperature of 165°F without the risk of overcooking on the grill. This is why we target 160°F as our removal temperature.
- Juice redistribution: The muscle fibers relax and reabsorb the juices that were driven toward the center during cooking. Skip this step, and those flavorful juices will pour out onto your cutting board instead of remaining in the meat.
The resting period is particularly important for pellet grilled chicken because of the unique cooking environment. The extended exposure to dry, smoky heat can concentrate the juices, making proper redistribution even more critical for the final texture.
After resting, slice your chicken against the grain to maximize tenderness. For presentation, consider slicing at a slight angle to create wider, more appealing pieces.
Pellet Grill vs. Traditional Smoking: A Detailed Comparison
When comparing pellet grill chicken breast methods to traditional smoked chicken breast recipe approaches, understanding their key differences helps you choose the right method for your specific needs.
Temperature Control and Consistency
Traditional Smoking:
- Uses very low temperatures (180-225°F)
- Often requires manual temperature adjustments
- Temperature fluctuations are common, requiring constant monitoring
- Relies on maintaining a clean burning fire with proper airflow
- Weather conditions can significantly impact temperature stability
Pellet Grilling:
- Features digital temperature controllers for precise settings
- Maintains consistent temperatures automatically
- Temperature fluctuations are minimal (typically ±10°F)
- Uses automated pellet feeding systems to maintain heat
- Weather has less impact on cooking environment
Cooking Time and Technique
Traditional Smoking:
- Much longer cooking times (2-3+ hours for chicken breasts)
- Uses the “low and slow” approach exclusively
- Difficult to sear or achieve crispy skin without transferring to another cooking device
- Requires more planning and preparation time
- Often uses water pans to maintain humidity
Pellet Grilling:
- Shorter cooking times (30-60 minutes for chicken breasts)
- Can use both “low and slow” or higher heat approaches
- Capable of searing (especially newer models and those with dedicated sear zones)
- More spontaneous cooking possible due to faster startup
- Dry heat environment without need for water pans
Flavor Profile Differences
Traditional Smoking:
- Produces intense, deep smoke penetration
- Creates a more pronounced smoke ring
- Stronger smoke flavor throughout the meat
- Wood choice has dramatic impact on final flavor
- Often requires wood soaking or careful management for clean smoke
Pellet Grilling:
- Delivers more subtle, cleaner smoke flavor
- Less visible smoke ring formation
- More balanced flavor that doesn’t overpower the chicken
- Pellet composition affects flavor but with less intensity
- Produces consistently clean smoke without management
Moisture and Texture Results
Traditional Smoking:
- Can produce extremely juicy results when done correctly
- Risk of dry meat is higher due to extended cooking time
- Texture tends toward pull-apart tenderness
- Creates softer bark or exterior texture
- Requires more skill to achieve ideal moisture balance
Pellet Grilling:
- Produces reliably juicy chicken with less technique required
- Shorter cook times help preserve natural moisture
- Texture remains sliceable with good bite resistance
- Creates better surface browning and firmer exterior
- More consistent results across cooking sessions
Convenience Factors
Traditional Smoking:
- Requires fire management and fuel monitoring
- Significant learning curve to master
- Tends to be more hands-on throughout the cooking process
- More cleanup required after cooking
- Charcoal or wood chunk preparation adds complexity
Pellet Grilling:
- Nearly “set it and forget it” operation
- Minimal learning curve for basic operation
- More hands-off cooking experience
- Easier cleanup with less ash production
- Simple fuel management with store-bought pellets
This comprehensive comparison highlights why pellet grills have become increasingly popular for cooking chicken breasts. They offer a sweet spot between convenience and flavor that makes them accessible to beginners while still satisfying experienced cooks who appreciate consistency and efficiency without sacrificing quality.
Conclusion: Mastering Pellet Grill Chicken Breast
Mastering pellet grill chicken breast cooking transforms this everyday protein into something truly extraordinary. By implementing these five irresistible pellet grill chicken breast tips—perfecting your preparation, seasoning generously, utilizing a two-phase cooking approach, executing the perfect sear, and allowing proper resting—you’ll elevate your chicken breast game to restaurant quality.
The beauty of pellet grill chicken breast cooking lies in its perfect balance of convenience and flavor. Unlike more demanding smoking methods, pellet grills deliver consistent pellet grill chicken breast results with minimal babysitting, making them ideal for both weeknight dinners and weekend cookouts. The precise temperature control of pellet grills virtually eliminates the guesswork that often leads to dry, overcooked chicken.
Remember that the key to perfect pellet grill chicken breast is understanding the critical smoked chicken internal temp targets while nurturing the meat through each phase of the cooking process. With each pellet grill chicken breast cook, you’ll develop greater intuition for your specific grill’s characteristics and how different chicken breast sizes respond to various techniques.
Whether you’re new to cooking pellet grill chicken breast or looking to refine your existing skills, these five tips provide a comprehensive framework for success. Your family and guests will notice the difference immediately—juicier, more flavorful pellet grill chicken breast with that perfect balance of smoke flavor and beautiful exterior that only comes from mastering the art of pellet grill chicken breast cooking.

